Arriving on site: Motorhome Water System
How to fill a motorhome’s freshwater tank
Ensure that all taps and the yellow drain-down valve are closed. The yellow valve can be found next to the water heater unit, usually under the front bunk. It is closed when the valve is horizontal.
The freshwater system in your motorhome can be filled in one of three ways:
Whale Aquasource
- This allows the tank to be filled directly from a tap up to 7-metres from the vehicle.
- To operate the Whale Aquasource, turn on the motorhome’s control panel and press the down arrow until you see the ‘Freshwater filling’ symbol. Press Enter. The ‘Start filling the tank’ message will appear, and you can connect the Aquasource hose.
- Lift the lid of the Whale Watermaster socket (located on the side of the motorhome) and insert the Whale Aquasource plug firmly into the socket.
- Connect the other end of the Whale Aquasource to the water tap and turn it on, ensuring there are no kinks in the pipe.
- When the control panel alarm sounds, turn off the tap. The onboard tank is now full.
- It is important not to leave the motorhome unattended when filling the tank.
Whale Submersible Pump
- This allows the tank to be filled from an Aquaroll. It will take approximately 2.5 Aquarolls to fill the tank completely.
- Fill the Aquaroll and position it below the Whale Watermaster socket that’s located on the side of the motorhome. Place the Whale submersible pump in the Aquaroll.
- Lift the socket cover and insert the pump into the socket.
- Switch on the control panel, and the pump automatically fills the fresh water tank with water. The pump will switch off once the onboard tank is full.
How to fill the Freshwater tank manually
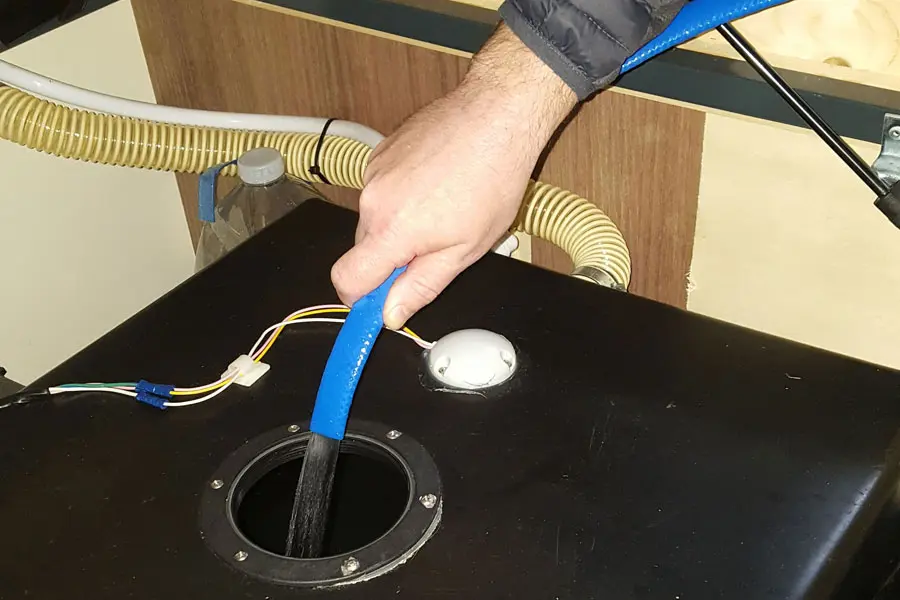
- The freshwater tank can also be filled manually using a standard hose inserted directly into the tank.
- Remove the hatch cover. This is usually in the centre of the floor.
- Unscrew the tank filler cap, insert the hose, and turn on the tap.
- Monitor the level via the control panel or check visually within the tank.
- Once full, turn off the tap. Remove the hose and replace the tank cap and hatch cover.
With the water tank full, open the hot tap in the kitchen. Go to the control panel and turn on the pump switch. As the pipes will be full of air and the 10-litre hot water tank will be the first thing to fill, it can take a minute or two for water to run from the tap. Once you have a steady stream, turn on the cold tap. Do this slowly, as air may escape first. Once the kitchen tap has free-flowing water, close it and carefully open all other taps one at a time, shower included. Close each tap when water runs freely.

How to drain the water system before travelling
Most sites have a motorhome service point. Park your motorhome’s outlet above the drain.
Draining the water system
- Locate the yellow drain-down toggle switch and open it. The switch is open when it’s vertical.
- Open all taps, shower included. Ensure that all taps are in the middle position, so that hot and cold are both open.
- Water will drain from a small hose below the water heater until empty.
Draining your motorhome’s freshwater tank
- Locate the freshwater tank hatch cover and remove it.
- Remove the drain plug at the bottom of the tank. This plug is accessed from inside the water tank.
- Turn on the pump to completely drain the system. Turn it off when empty.
Emptying your motorhome’s wastewater tank
- Ensure the wastewater drain tap (usually located behind the vehicle’s rear wheel) is above the drain point.
- Open the tap.
- Close the tap when empty.
