Caravan DIY - part one: blinds and hitch

Tensioning Remis Blinds
Roller blinds can lose tension over time, especially if they’ve been closed for an extended period. Jiggling may help on occasion, as can easing them upwards at a snail’s pace, but suffer no more as re-tensioning troublesome blinds is a remarkably easy process requiring the minimum of tools.
Tools required: flat-bladed screwdriver
- Remis adjusters are located to the left of the roller mechanism and the slots accept a normal flat-bladed screwdriver. You may need to unclip the curtain end.
- Determine which blind requires adjustment. The top slot adjusts the fly screen, while the bottom slot adjusts the blind.
- With the blind open, feed the screwdriver into the slot and push slightly against the spring. The mechanism pushes the adjuster outwards, keeping it secured in locating lugs.
- With the adjuster pushed in and the screwdriver firmly in the slot, turn the adjuster clockwise to tighten the spring. The locating lugs are in 90-degree segments, so rotate clockwise a quarter turn before checking the blind tension.
- More tension can be added by rotating the adjuster another quarter turn. Too much tension? Simply turn anti-clockwise.
- With the blind functioning correctly, clip the curtain back into place and make a cup of tea.

How to fix a squeaky hitch
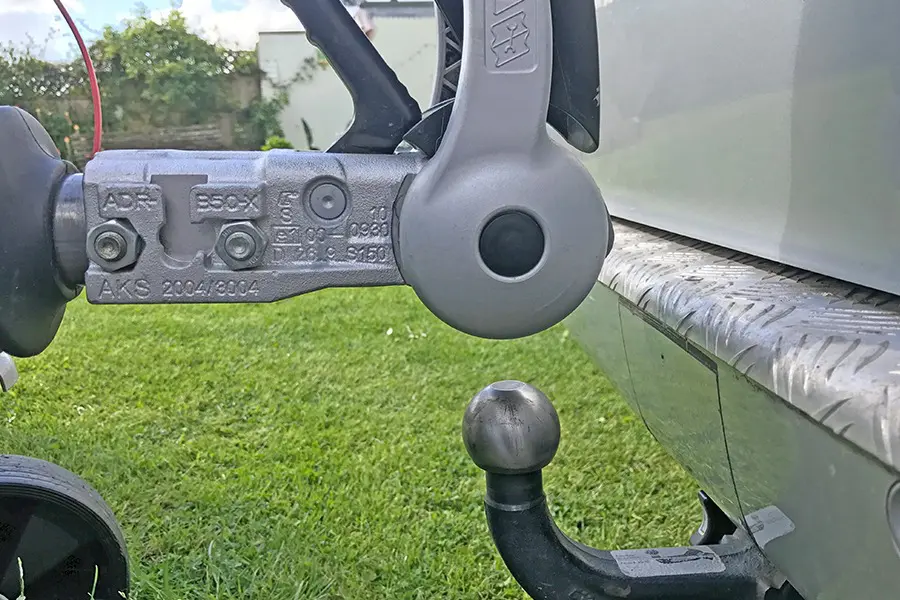
I’m sure most of us have suffered from a squeaky hitch at some time. Pedestrians have covered their ears whilst I’ve been negotiating a town centre mini roundabout, and I’ve squeaked around many a peaceful site in search of the perfect pitch. Thankfully fixing the issue is relatively straightforward and won’t have you reaching for the ear defenders. This guide shows you how to deal with the two outer pads on an AL-KO 3004 hitch.
Tools required: Flat-bladed screwdriver, hammer, sandpaper, brake cleaner, punch (or unloved screwdriver), clean tissue
- The problem is usually caused by contaminated pads within the stabiliser hitch head. There are four in total, each resembling a small brake pad, with the outer pads clamping onto the tow ball when the larger lever is pushed downwards.
- Check the pads for wear by hitching your caravan to the car and gently pressing the larger lever downwards until slight resistance can be felt. This allows the pads to press on the tow ball without pressure. Check the arrow on the lever against the green and red marks on the hitch head. Green is good, red means the pads need replacing.
- Pry the circular caps from the side of the hitch head and place a punch, or screwdriver, against the rear of the pad. Remove the pad by tapping the punch with a hammer, making note of a shim that may be behind the pad.
- Clean the outer part of the pad (where it contacts the tow ball) with emery paper, until the shiny surface turns matt. I tend to use 400-grit paper. Clean with brake cleaner to remove contaminants.
- With clean hands, push each pad (including any shims) back in place with a thumb. Replace outer caps.
- Clean the tow ball with brake cleaner. Grease should not be used with this type of hitch and the ball needs to be clean and completely grease-free. Should the ball itself still be painted in a black factory finish, remove all traces of paint with 400-grit (or similar) sandpaper and clean with brake cleaner.
- Attach hitch to the tow ball, checking the wear indicators once more.
- Throw earplugs in the bin!

Latest news & events
See all news & eventsChipping Sodbury Spring Sales Event
BADMINTON ROAD, CHIPPING SODBURY, BRISTOL
West Country Motorhomes Open Weekend
BRISTOL ROAD, BRENT KNOLL, HIGHBRIDGE, SOMERSET
Swindon, Oxford and Reading Caravan and Motorhome Centre Easter Sales Event
GREATFIELD, ROYAL WOOTTON BASSETT, WILTSHIRE
Grantham's Midlands Caravan & Motorhome Season Ready Show
SPITTLEGATE LEVEL
GRANTHAM

